|
|
Post by ash on Dec 12, 2009 10:38:30 GMT 9.5
I like these competitions. They give me something to work on outside of the usual process of army building. They allow me to explore my bitz box and find all sorts of interesting odds and ends.
My previous entry showed my Orc Warboss Gormath Grinsmasha during a dueal which he will no doubt be victorious in. This competition will allow me to field an entry which will show some of my greenskins failing.
Greenskins can fail in all sorts of ways due to their interestingly ramshackle machines of war or just the plain uselessness of their Leadership characteristic. Although I am tempted to explore this lack of leadership with a Group of Nightgoblins legging it from a shepard boy wielding a stick I think i'll go with some sort of failing warmachine.
In the past I have come up with some interesting rules and concepts for my Greenskin armies none have had such a potential for fail as much as my Squig Chariot.
My Night Goblins are an interesting bunch. When it comes to war they can definitely hold their own with many victories going to armies made up solely of Night Goblins however in a mixed army they play a support role. Generally they are just Fanatic delivery machines or are used to operate warmachines (I hate normal goblins so I replace Goblin warmachine crews with night goblins).
My Night Goblins are lead by an interesting character who likes nothing more to dabble with inventions; very unnightgobliny I know but thats the way he is and as they say 'you are who you are'!
He has loaded up Stone Throwers with Squigs with mixed results, Has replaced Fanatics Balls and Chains with Squigs, he has even tried training aquigs to be fielded in units without the Night Goblin Herders. Typically these inventions of his either fail dramatically or are incredible successes (nothing like a squig to be fired into Empire lines from a Stonethrower to have the squig go on a massive eating frenzy!)
Yet there is one invention that has never ever worked; The Squig Chariot.
The Squig Chariot is an easy concept to grasp; you take 4 Squigs of the hopper variety (they have the best pulling power) and attach them to a chariot chassis. The chariot and any 'Volunteer Night Goblin Drivers' will then bound straight into the enemies lines causing all sorts of havok.
Well thats the desired outcome anyway...
What generally happens is once the Squigs make it out of the cave and into the sunlight they just jump in whatever direction they like tearing the chariot appart and any 'Volunteer Night Goblin Drivers'...
A fail most epic!
Thats the general idea behind my entry. More posts to come!
|
|
|
|
Post by calicojack on Dec 12, 2009 19:09:23 GMT 9.5
brilliance!...sheer brilliance! cant wait to see this, good concept since you have more than enough spare night goblins. how do you intend to do the squiggies? green stuff?
|
|
|
|
Post by ash on Dec 20, 2009 21:31:55 GMT 9.5
I have been thinking about the concept of this entry for a while now. I will use a few of the Night Goblin Fanatics that I have lyong around as they are in good 'getting thrown around' poses. The aquigs are a matter that I will need to think more on. I could try my hand at sculpting a few squigs but am not very confidant that I can pull it off.
I have a few squig hoppers and a few squig herds that I really do not use so maybe I can make use of them, with a few alterations of course.
As for where it is all taking place I am thinking at the mouth of a cave. Would be fun to make that up and I really like painting stone and other strong textures. Well its still a mystery to me exactly what I'll be doing and how it will end up. Guess ill just play it by ear.
|
|
|
|
Post by ash on Jan 6, 2010 11:53:08 GMT 9.5
Change of plans on this. Instead of Night Goblins I will be using Snotlings, yes snotlings. They will be trying to imitate the larger of the greenskin races (Orcs), as they do.
This change is due to the fact that a) I can not be bothered doing 4 Squig sculpts this late into the comp and b) the only squigs I have are rather puny so will look odd if they are throwing NG's about.
I have just about all the parts that I need for the comp minus the base that I will be putting it on. I am thinking coffee jar lid with some sculpted stone and other cool things. Will need lots of GS mushies and a small water effects thrown in there as I love GW water effects.
|
|
|
|
Post by ash on Jan 12, 2010 14:59:44 GMT 9.5
Another change of plans!
I found an old model of an orc that I was working on for my fantasy Army. It was an Orc Shaman who was in the midst of trying to contain too much energy. He was literally splitting at the seams with energy.
I will be doing something similr to this but will instead be using a 40K Ork Warphead. When there are so many orcs fighting in proximity to the warphead the pure ferocity and nature of WAAAGH power gets channeled through the Warphead who then (hopefully) uses it to blast the enemy.
I will be modelling a Snakebite Warphead bursting at the seams with WAAAGH energy, uncontrollably destroying everything in close proximity. Unfortunately no enemies were near enough to feel the wrath of such power.
Expect some DBZ style pyrotechnics and a few destroyed orks and grots. Will be making a start on this today!
|
|
|
|
Post by ash on Jan 16, 2010 12:54:17 GMT 9.5
'Eadbanger!That is now the official name for my Fail Comp entry. I have briefly described what I will be doing with this in my previous post but now its time to go into a bit more detail. Orks draw on the power of the WAAAGH, with this they can do all sorts of amazing feats such as becoming monsters of combat, shrugging off wounds or if they are a 'Weirdboy/Warpheap' can perform feats of magic/psychic awesomness. Sometimes these bursts of psychic awesome can go very very wrong for the Weirdboy/Warphead (Ill just refer to them as Weirdboys from now on) as their body can be infused with so much WAAAGH energy that they can not handle it. This can happen in a number of ways but most spectacularly of all is the 'Eadbanger'! The Orks head explodes under the pressure and rampant WAAAGH energy destroys all within range. In some cases a chain reaction of 'Eadbangin can go off as the energy dances from host to host and is unable to be contained. This is what my entry is all about and is sounds good in theory. However the technical aspects could easily go well beyond me and it could all go pear shaped. This will be the first time in one of these comps that I will use lighting effects. I want a nice green glow in certain parts and luckily enough White Dwarf has recently done an article on painting such an effect. But more on that later. The centre of the scene will be the Weirdboy in the middle of his 'Eadbanging enterprise. He will be arched backwards wrapped in WAAAGH energy, his eyes aglow his mouth gaping with energy spilling out, splits will run down his sides and more energy bursting through. Under him the ground will be bowled into a smooth crater. If you have seen Dragon Ball Z (the cartoon/anime, I use the term loosely) and have seen the chasracters power up or a massive attack being performed you will have likely seen this effect. The entire base will pretty much be depicting this this cratering effect with a glass like surface. There will be a few Ork 'casualties' minus their heads and if I get adventurous enough one might be in mid explosion. It will be a sort of gory scene but not overly so. I might even have some rocks lifting into the air carried on waves of energy. Dont know on this yet. 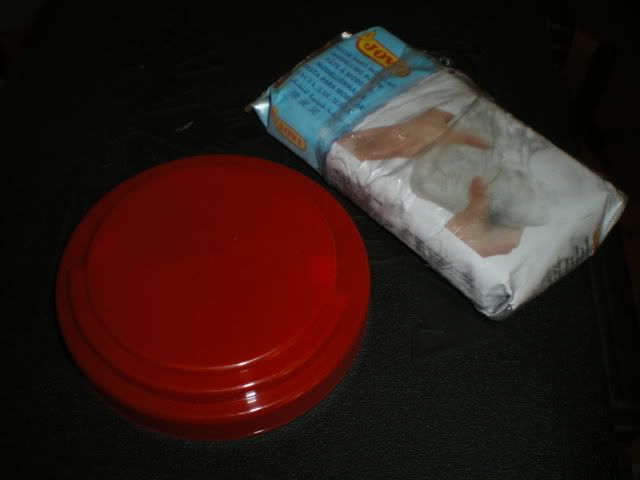 This is the base I will be using. Its from a 40 jelly shots tub and the lid is deep enough to accomodate the 'bowling' effect of the base. Also in pic is my 'Bon' Jovi sculpting clay which I keep frozen in the freezer for storage. That about explains my entry.
|
|
|
|
Post by ash on Jan 18, 2010 10:50:12 GMT 9.5
The past day or so has been spent working on the base. I have mentioned that I wanted it to be bowled out like a smooth crater and this is how I went about it. I took the container lid that I was going to use as the basis of my base and cut the top out of it. The plastic was much harder than I thought it would be so caused myself a slight mischief in the process. As the plastic was so hard I did not bother trying to get a round hole, I opted instead for something much more angular and did this via a process of scoring and snapping. 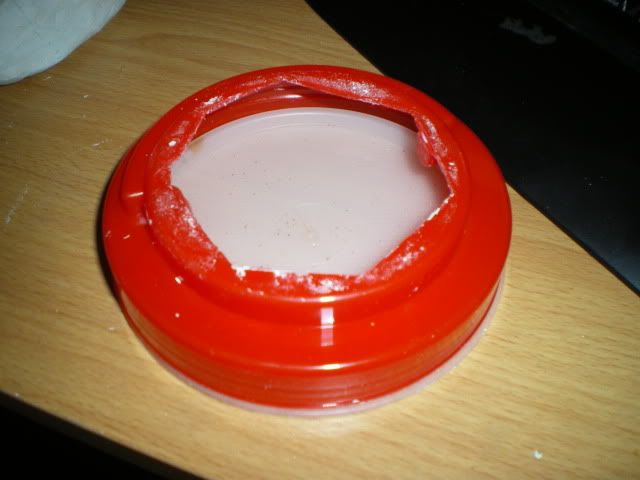 I knew that I wanted to partially fill this base with clay to give it some weight and support so I needed it to have a bottom. Upon scanning my modeling table I found a lid for one of my Bitz Tubs. It fit perfectly. Simple as super gluing it on! 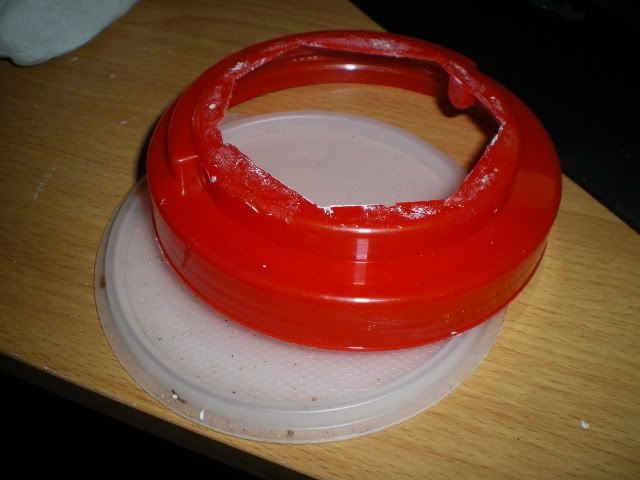 Once this was dry I half filled the hollow with clay and then applied a donut of clay just under the top opening. I did this as clay has a bit of flex in it and as I was going to make the top pretty thin so as to work with it easier to get the bowling effect I needed it to be able to rest on something at the low point of the bowl. 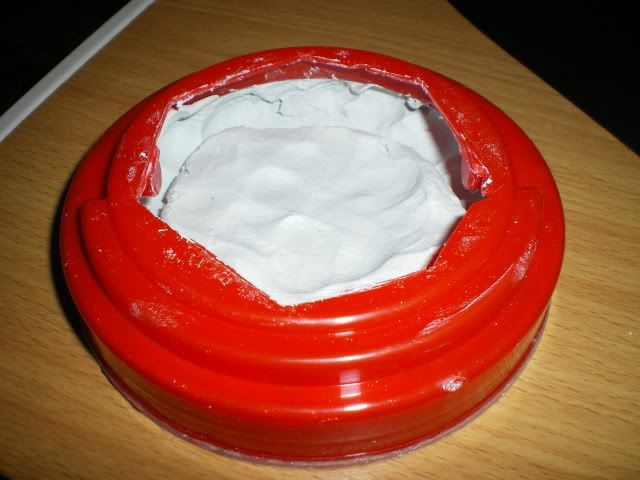 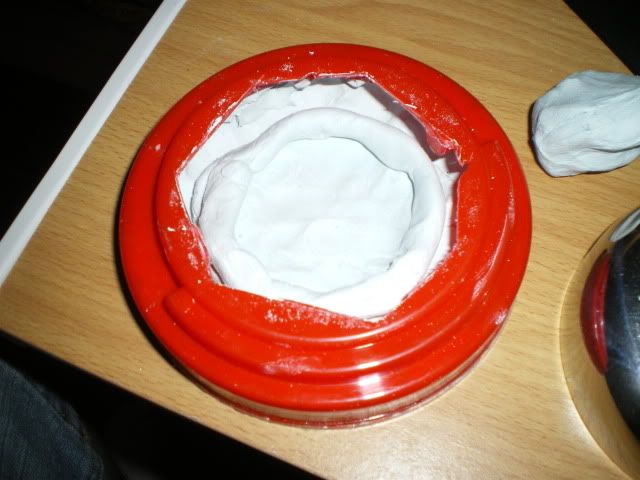 Now I needed to roll out a piece of clay quite thin. I did this with a old jam jar, one of the ones which you wash out and use as a glass. I did this very carefully as too much pressure and I could smash the jar. I have no idea why I chose a jar over everything else but its probably mostly to do with the fact that when I'm in the zone the first thing that comes along is what I use... no matter how stupid it could be. 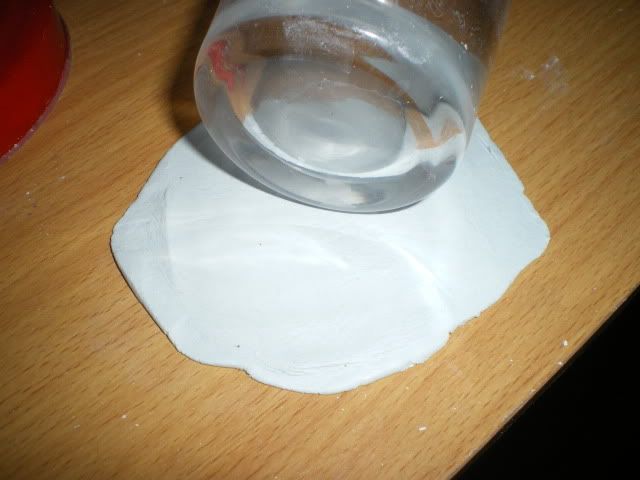 with the clay now flat I needed to cut it out. I just found a round object and pushed it through, funnily enough that object happened to be another bits tub lid. This was much in the same process of using a cookie cutter. 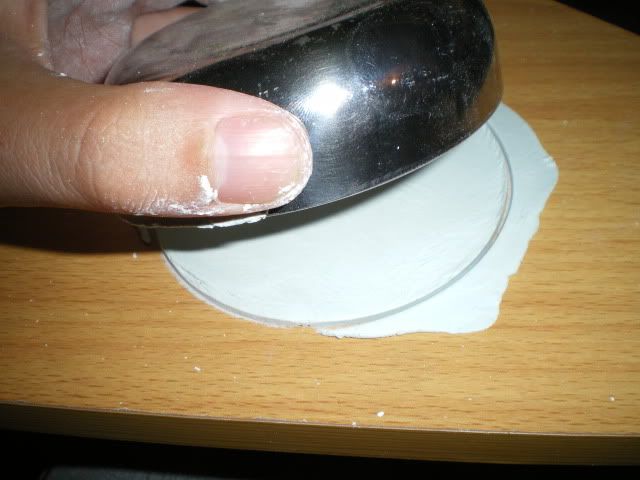 I then laid the flattened disc of clay over the opening at the top of my base and allowed it to naturally sag in. With that done it was time to let it dry overnight. 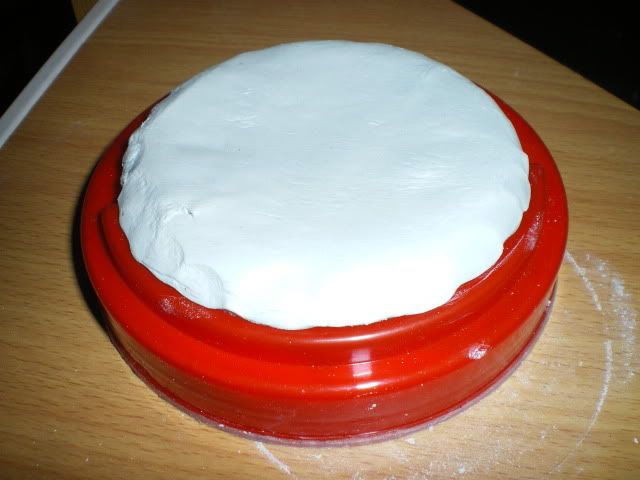 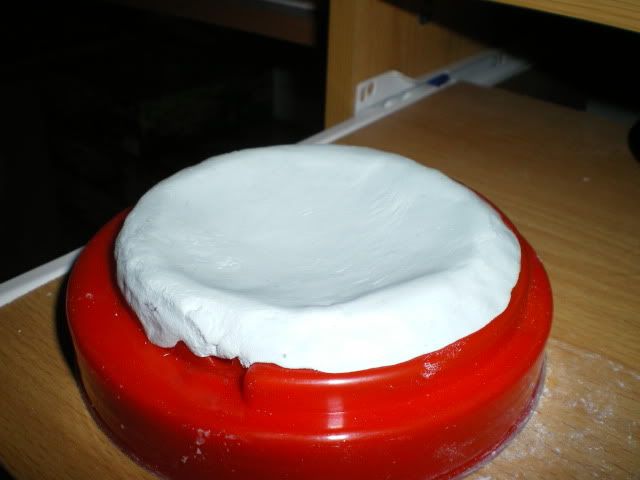 FAIL!!! FAIL!!!In the last picture you can clearly see the clay bowling into the lid and it actually bowled in a lot more than you can see. It was looking like it was going to be fantastic but then it dried and it all went bad. I was expecting the clay to shrink slightly and I have used the stuff before but the amount it did shrink was huge. It shrank enough to pull itself taught again and about 90% of the bowling effect was nullified! I have no more bowl, just a flat smooth top to my base... I may try it again but this time leaving a weight in the center, something suitably bowl shaped to leave its impression as the clay dries. Or ill just do away with the effect altogether and just move on with the rest of the entry. |
|
|
|
Post by ash on Jan 20, 2010 20:33:12 GMT 9.5
Recovery!!My last post detailed how I attempted (and failed) to add in the 'bowling' effect to the ground. I have learned a bit more about the modeling clay as a result of that failure so not all was lost. So I was with a choice; to redo the base and make an attempt at the effect again or try something different. I opted for the later. The pictures below show what it is that I have gone for; a broken/smashed rock effect. The ground has been put in such a state as the forces of the WAAAGH energy have disrupted all around its source, everything is busting apart. 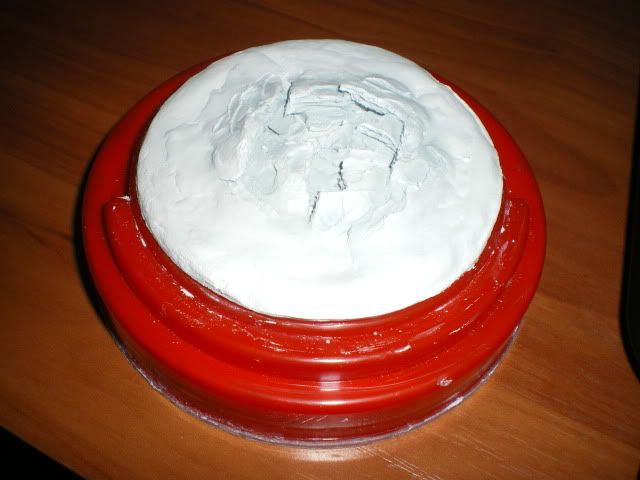 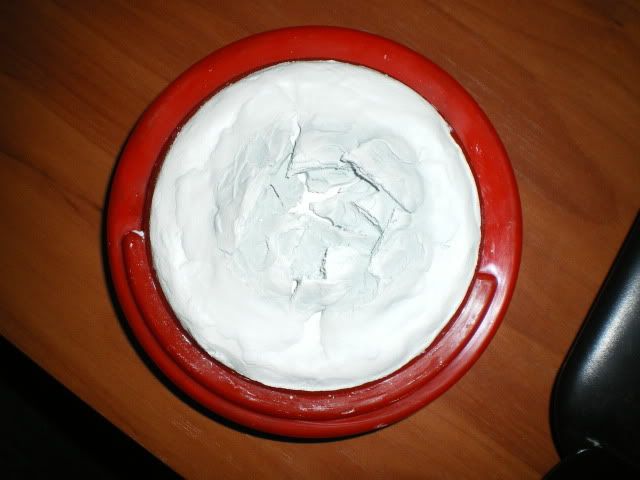 The pictures turned out a little bright but you should have a general idea of what is going on. I was hoping to have some shots of this effect being created but alas the cameras battery was depleted so you will have to excuse me on that. Basically all I did was flatten out some clay and cut it into jagged shapes. I layered these in a way that they radiated from a center point and pressed the outside edges against the preexisting clay base. After the clay had dried a little, maybe 2 hours, I started to sculpt it into something resembling slate. I chose slate as it has the best texture in my opinion but I had no more in my yard! It did not turn out absolutely stunning but I'm hoping it will do the job with some paint on it. Ill now finish off the base with sand/gravel and lots of static grass. The pit itself will be painted as if it were some kind of green lava like substance was trying to escape. Having this in the base will allow me to toy around with directional lighting effects which should be interesting to attempt to say the least 
|
|
|
|
Post by ash on Jan 21, 2010 17:31:41 GMT 9.5
Have made some more progress on the scenes base. I masked off the parts of the base that I wanted to remain smooth, mainly the edges, and hit it with some Rough Coat. With this dry I applied two layers of modeling sand mix and topped it off with some watered down PVA to seal. 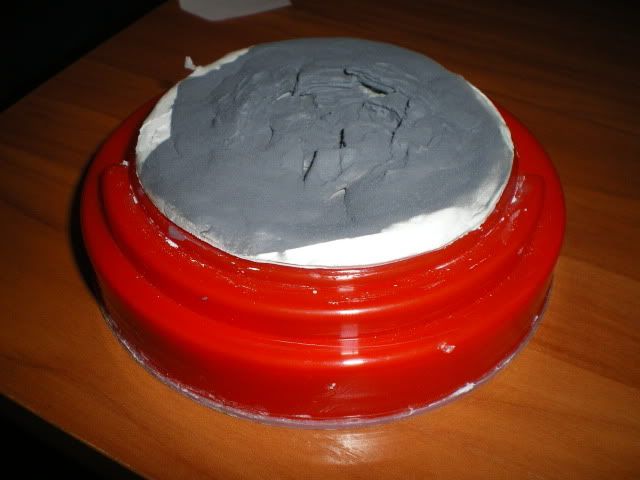 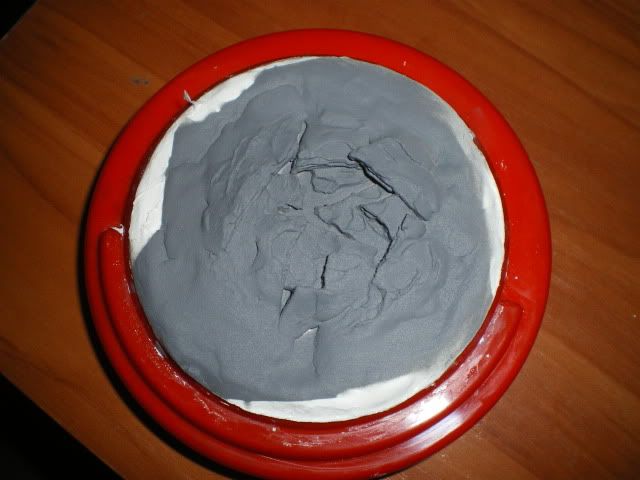 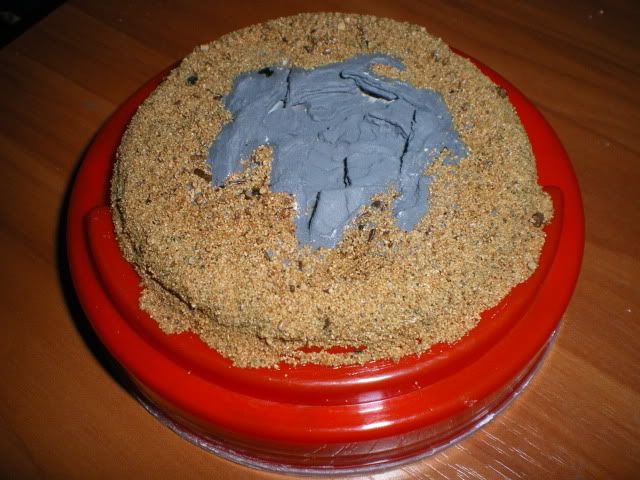 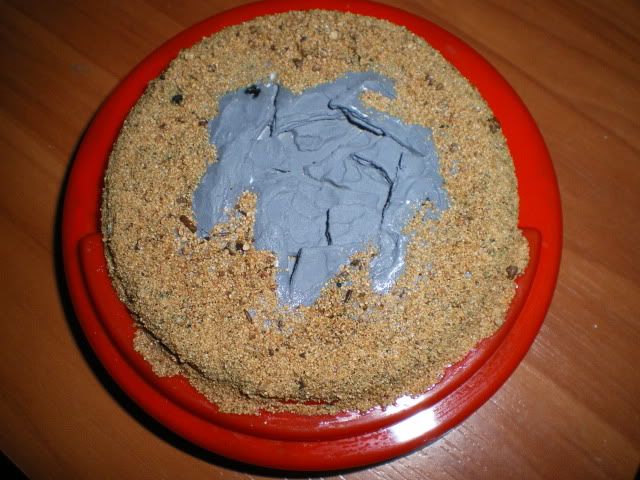 When all this is dry I can undercoat it black and start putting some color on it! Then its time to start thinking about the miniatures themselves. |
|
|
|
Post by ash on Jan 23, 2010 19:35:56 GMT 9.5
Made a lot of progress in the last day or so on the base. Its just about finished now which means I can focus most of my attention to the miniatures which will make up the rest of this scene. Ill talk more about the minis in my next post as for now ill talk about painting the base and what I have learnt. I wanted to strive for a half decent lighting effect that made the rupture in the ground look like it was exuding a greenish glow. I used the article in the recent WD (has some Empire Hand gunners on the cover) as a guide. I followed this really loosely as I did not want to get into as much detail as the eavy metal team would do and I wanted to keep it to my own style with not too much blending between shades. After undercoating the model black I painted the inside of the rupture Orkhide shade then highlighted this with successive layers of Snot green, scorpion green and sunburst yellow. I then followed this with glazes of snot/scorpion green mix to take the harsh yellow back to a greener hue. After the rupture was painted I did up the rest of the base as I usually would. Next I used glazes to add the glow to the edges of the slate and followed this with some very sparing highlights of scorpion green and sunburst yellow. These were then glazed back to tie them in with the rest of the greens. I did not really use much patience on the process as I really just wanted to see how the colors would interact this time round. Next time I have a go at this type of thing ill do it on a smaller scale and put some more effort into it. Still, I'm pretty happy with how it turned out anyways (even if it looks a little chalky) 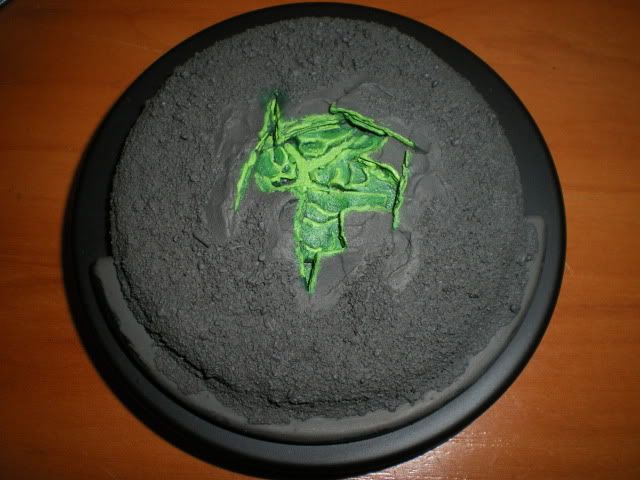 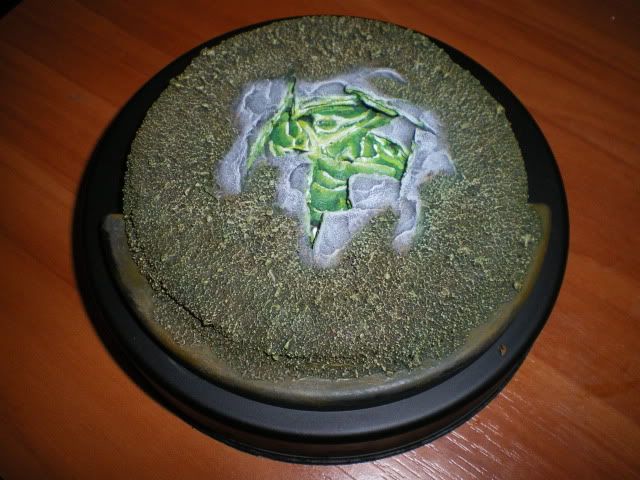 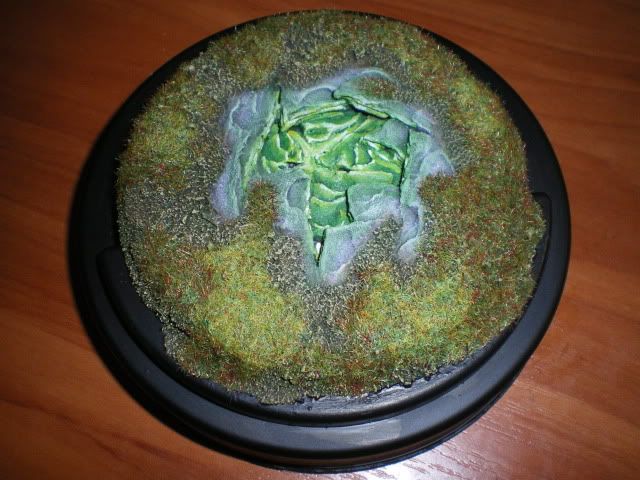 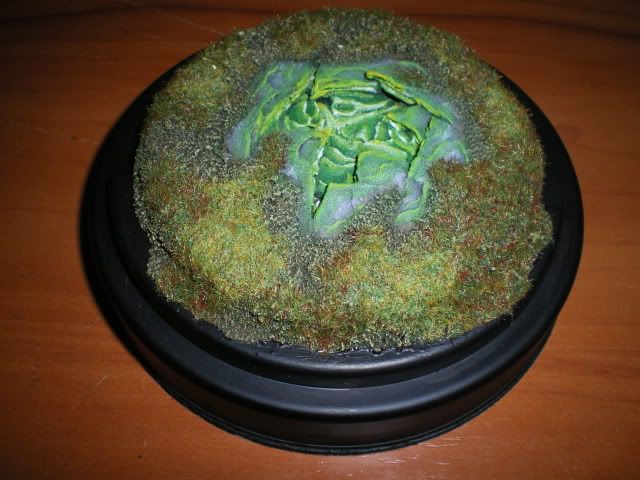 In the photos where it looks really white its due to the flash. These areas are really a yellow green color and quite bright. |
|
|
|
Post by ash on Jan 30, 2010 0:09:03 GMT 9.5
It's now officially Saturday the 30th of January. This means I have bugger all time left to get together the Ork Weirdboy, convert him into its new pose, sculpt some flashy/lightningly/explodey stuff and paint it! Well about a week really, I forgot about the extension  Plus I have a shed load of paperwork to fill out before Monday. Obviously this paperwork is not linked to this project but I am just letting you all know what I am working with here constraints wise. Maybe I could just submit the cratered base. The Weirdboy failed so badly nothing of him is left? That would be too much of a copout but I guess we will have to see what happens! |
|
|
|
Post by ash on Jan 31, 2010 20:07:53 GMT 9.5
From Nob to Weirdboy, One Orks Journey pt 1With the base just about finished I needed my starring Ork for the scene. The scene called for an Weirdboy in the act of exploding. This was going to take some hefty conversion work and a lot of reposing and I did not fancy doing this with metal components. I needed it in plastic but unfortunately they do not make Weirdboyz in this medium. I had to figure this out. Rummaging through my spare parts I stumbled across a large number of Plastic AOBR Nobs. Surely I would not miss one (this will bite me in the backside later of course) 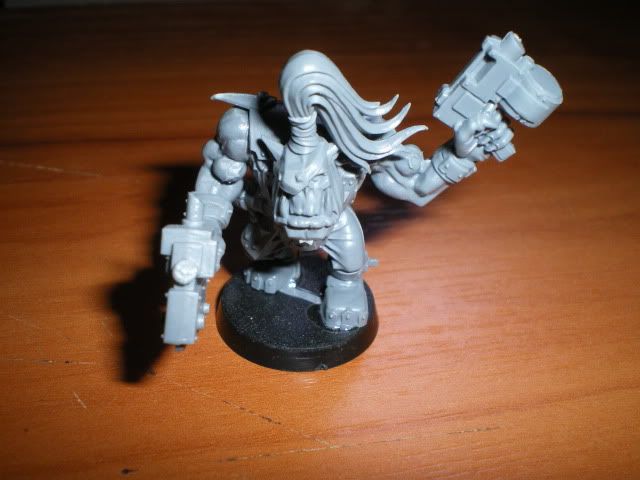 I also found a few arms which looked like the would hold a staff or some other form of totemic stick. 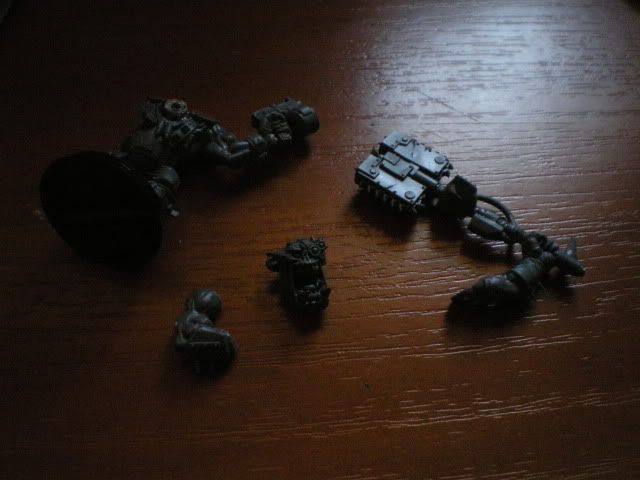 As I rummaged I came across the Ork Warboss head from the same set. The mouth is wide open and the eye looked like it could be wincing in pure bliss/power/pain of the excess Waaagh energy. Unfortunately it had a bionic eye and as weirdboyz are not well known for harnessing Ork Teknology this would need to go. I promptly cut this out and had the idea that this would be a great spot for a breach in the Orks skull. I widened the area of removal until most of the cranium was gone. Later I will re sculpt this into something more suitable for the scene but more on that later. The body needed repositioning. Limbs were cut, bent, resealed with wedges of sprue and plastic glue. This forms a nice foundation for further detail work such as sculpting. I was aiming for the Weirdboy to look as if he is being lifted into the air full of Waaagh energy, writhing trying to contain the energies within (and failing). I believe the finished pose has achieved this but it is hard to see in the pics as its just laying on the table. 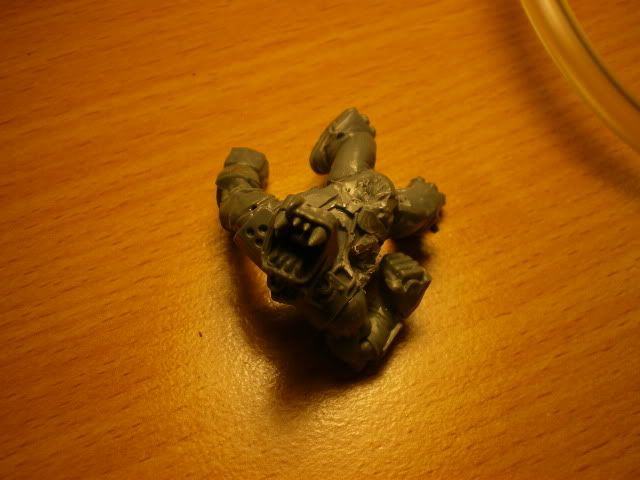 I now have about a week to do all the sculpting to get this Nob looking even more like a Weirdboy. Ill be covering any armor plates with furs, leather jacket, thonging and various bones. Plus work on the damaged areas some more. (sorry about the pics but the flash on the camera seems to have crapped out)
|
|
|
|
Post by ash on Feb 6, 2010 10:52:22 GMT 9.5
Last night I got some of the greenstuffing done. Just a little bit as I watched a movie. Mainly concentrated on the wounds the exploding power has caused to the orc.
Later today Ill get to work making him look more like a Weirdboy and tomorrow I'll be painting. Thats right, once again its gonna come down to the wire!
|
|
|
|
Post by ash on Feb 6, 2010 20:29:23 GMT 9.5
Looks like im going to have just enough time to sculpt the Weirdoys jacket and furs. I wanted to get more done but looks like thats not going to be possible as I need to have it undercoated tonight and will only have about 6 hours to paint him tomorrow as I have the ABGG session during the day..... This one is going to be a close call...
|
|
|
|
Post by ash on Feb 7, 2010 0:02:35 GMT 9.5
Greenstuffing nearly complete... cue one half-arsed jacket with a pseudo fur collar! Thats pretty much it for the night, just have a few stitches to put in the leather and a few dangly bits and I am done. Tomorrow will be a decent paint session then I am done. one week off for the voting then we start all over again  |
|
|
|
Post by ash on Feb 7, 2010 23:12:25 GMT 9.5
Finsihed at 3 minutes to midnight after much BBQ and Alcoholic Beverages. Final write up and pictures tomorrow then on to voting!
|
|
|
|
Post by ash on Feb 8, 2010 11:51:45 GMT 9.5
Last night was the end. I finished all that I could do in the alloted time period and it looks ok. I was having a go at exploring lighting effects and I definitely learned a thing or two. The Weirdboy had his sculpting completed. It was a multistage process which included carving out the areas where the wounds would be and refilling them with detail. Most of this done in two stages with an initial bulking out layer followed by a smoother detail layer. 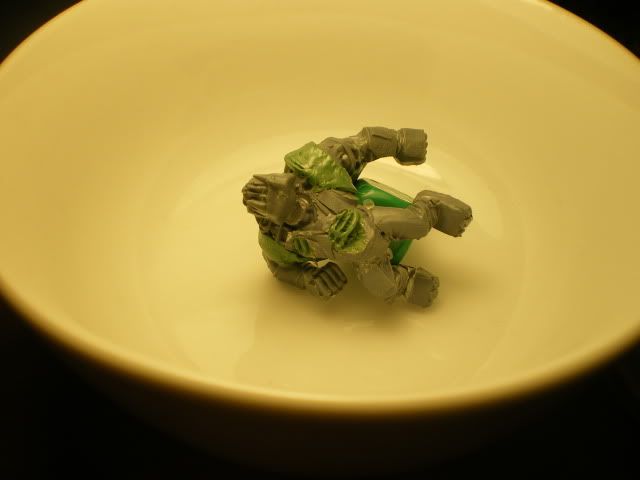 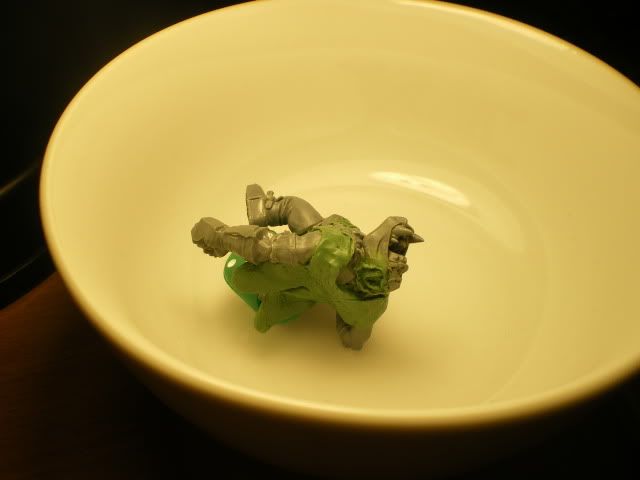 (Both the above pictures are of the sculpting in its initial bulking out stage. This is followed by a much nicer looking detail layer.) This is really the only way to work with greenstuff in large amounts. I think it turned out alright but I still would like to improve a lot with my sculpting. This will be achieved over time with practice like all things. Painting the miniature was done in much the same way as painting the base. I painted the weirdboy as I normally would do but hit all the wound areas with several coats of sunburst yellow. Once all this was complete I started to layer on thin, translucent layers of snot green where the light from the energy would spill out and light up areas in proximity to the sites. This stage was highly rushed as I only had about an hour to complete this so I had to use thiker glazes and had to go through to yellow in a lot less steps than I would liked to. This gave the finish a much too yellow appearance and chalky. With 15 minutes left I realised I had to do the areas where the light coming off the base would hit the miniature. Rush, rush, rush was the goal. 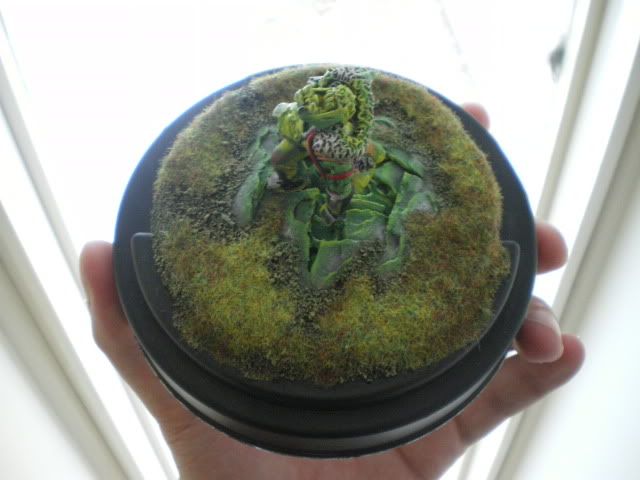 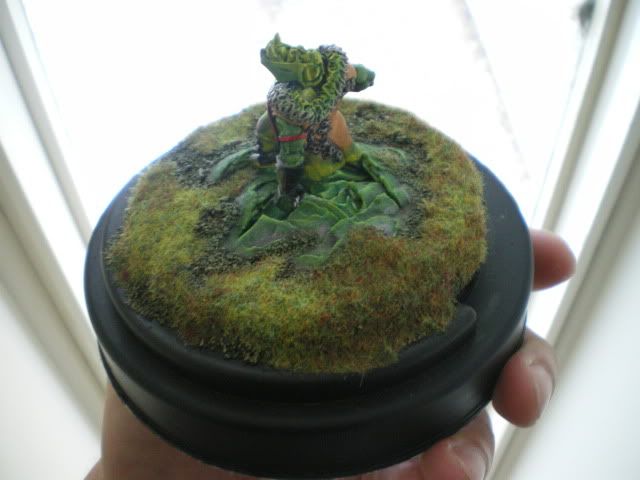 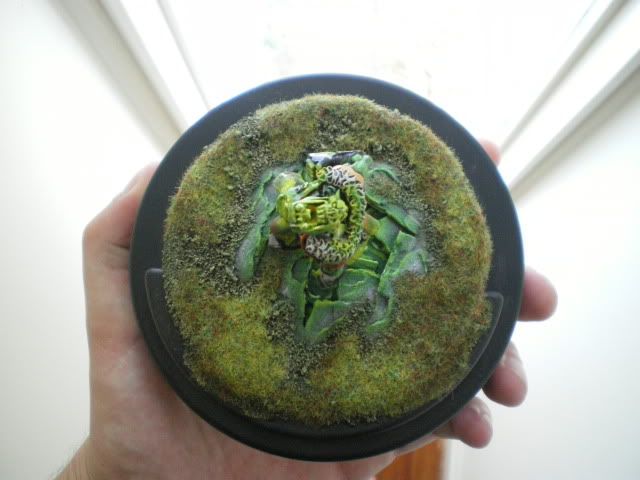 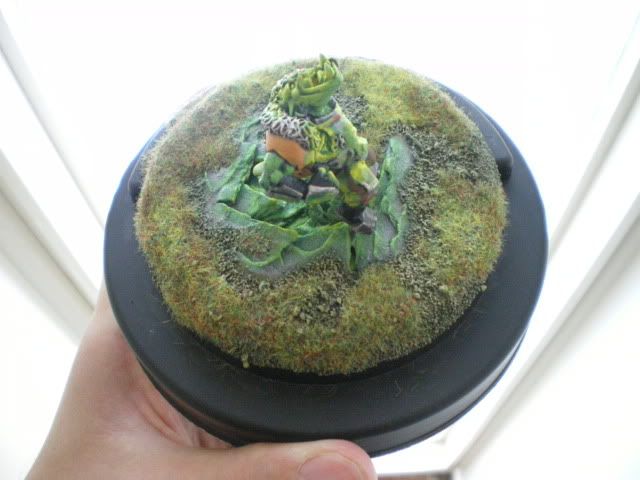 In the end I am not as happy with the result as I would like to have been but its complete and thats another competition challenge out of the way  So this challenge has now ended. Biggest lesson... do not put myself in a situation where you have to rush your painting! Still the painting on the miniature turned out alright for something that was done in about 4 hours amongst boardgame meets and drinking/bbq! |
|


