Post by alex on Dec 28, 2010 19:17:44 GMT 9.5
As some of you know Greenacres Gamers will be hosting the inaugeral Griffin Grove Adelaide Dungeon Bowl Cup on feb 27th.
One thing I've been really keen on doing for this tournament is to build a 3D dungeon for the grand final to be played on. This turned me on to Hirst Arts Molds.
As I explored the availability down under I discovered the Griffin Grove Gaming are the sole authorized retailer of Hirst Arts molds in Australia. Not only that but they cost about the same as they do if ordered directly from Hirst Arts in the USA. In addition to selling molds, Griffin Grove also cast to order in dental stone, for those people who only want a small amount or don't have time to make castings themselves.
So I was very happy when Ian at Griffin Grove came on board as the major sponsor of the tournament, offering a variety of prizes for players, and of course help with making our grand dungeon for the tournament final!
You can find details of Griffin Grove's sponsorship prizes here. It is important to note that every player who pre-registers for the tournament will receive a free dungeon kit so they can put together a room to link on to this dungeon project, so hopefully this won't be the last modeling diary associated with Adelaide Dungeon Bowl Cup!
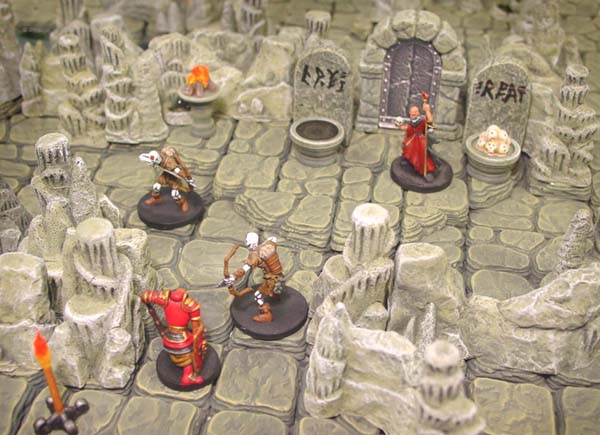
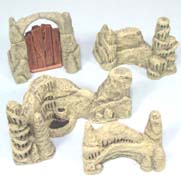
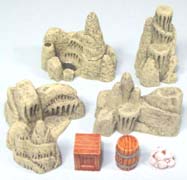
I wanted to emphasize the wild untamed wilderness for this dungeon, imagining a large natural cave system. Hirst Art's Cavern style seemed like just the ticket, as shown in the images below. Rather than a man made (or dwarf made/goblin made etc) dungeon of masonry and stacked stone I wanted a cave system with weathered stalagmites, cracked tiles, treacherous waterways and dark corners that might hide monstrous creatures.

Towards this I purchased 4 molds, from Griffin Grove.
cavern floors,

cavern floor accessories,

water cavern walls

extra water cavern walls

The first thing I did, while I waited to get my hands on some good dental plaster, was make some rough castings with some Plaster of Paris. I then tried a few arrangements and got some ideas for the dungeon.

I soon realised that I was going to need more floor tiles, especially if I was going to stack them to make different levels.

and so I set upon my first project, making a new mold to enable me to cast up extra floor tiles in addition to those from my existing molds.
First however I decided to make a small practice mold to get familiar with the silicone process.
I decided I wanted more of the simple bricks included in one of the molds, These blocks will be used for construction of some of the more man made structures in the cave, like bridges and occasional walls.
So to practice my mold making skills I made one with 3 full inch bricks, one 3/4 brick, one 1/4 brick and one 1/8 brick.


To make the large mold of floor tiles I glued 36 casting squares to a 6 inch tile to act as the master.

I Realised that I would not always need this many tiles in one large block, and that it would be better if I could snap this block up into different sections.

So I cleared out space between some of the tiles. This means that more silicone will run between these tiles, keeping them relatively separate when cast in plaster.


As you can see from the shot below this drastically increases the number of tiles I can make with each casting.

THe product I used to make the pink molds in the image above is called Pinkysil. This is a RTV silicone (room temperature vulcanising) which is easy to use because it is mixed in a 1:1 ratio. I found it great to work with when making the small mold in the image above, but when making the large mold the silicone set too quick and impeded my ability to get it finished in time. (Pinkysil starts to gel in 6 minutes or less depending on the temperature).
Next time I will use an RTV silicone with a a longer pot life, like Ultrasil.
FTR I bought the silicone and dental plaster from adelaide molding and casting supplies in Ascott Park. www.amcsupplies.com.au THey deiliver and also sell over the counter
After a day and bit of casting this is the product of my labour (and over 4kg of hydrocal).


One thing I've been really keen on doing for this tournament is to build a 3D dungeon for the grand final to be played on. This turned me on to Hirst Arts Molds.
As I explored the availability down under I discovered the Griffin Grove Gaming are the sole authorized retailer of Hirst Arts molds in Australia. Not only that but they cost about the same as they do if ordered directly from Hirst Arts in the USA. In addition to selling molds, Griffin Grove also cast to order in dental stone, for those people who only want a small amount or don't have time to make castings themselves.
So I was very happy when Ian at Griffin Grove came on board as the major sponsor of the tournament, offering a variety of prizes for players, and of course help with making our grand dungeon for the tournament final!
You can find details of Griffin Grove's sponsorship prizes here. It is important to note that every player who pre-registers for the tournament will receive a free dungeon kit so they can put together a room to link on to this dungeon project, so hopefully this won't be the last modeling diary associated with Adelaide Dungeon Bowl Cup!
I wanted to emphasize the wild untamed wilderness for this dungeon, imagining a large natural cave system. Hirst Art's Cavern style seemed like just the ticket, as shown in the images below. Rather than a man made (or dwarf made/goblin made etc) dungeon of masonry and stacked stone I wanted a cave system with weathered stalagmites, cracked tiles, treacherous waterways and dark corners that might hide monstrous creatures.

Towards this I purchased 4 molds, from Griffin Grove.
cavern floors,

cavern floor accessories,

water cavern walls

extra water cavern walls

The first thing I did, while I waited to get my hands on some good dental plaster, was make some rough castings with some Plaster of Paris. I then tried a few arrangements and got some ideas for the dungeon.

I soon realised that I was going to need more floor tiles, especially if I was going to stack them to make different levels.

and so I set upon my first project, making a new mold to enable me to cast up extra floor tiles in addition to those from my existing molds.
First however I decided to make a small practice mold to get familiar with the silicone process.
I decided I wanted more of the simple bricks included in one of the molds, These blocks will be used for construction of some of the more man made structures in the cave, like bridges and occasional walls.
So to practice my mold making skills I made one with 3 full inch bricks, one 3/4 brick, one 1/4 brick and one 1/8 brick.


To make the large mold of floor tiles I glued 36 casting squares to a 6 inch tile to act as the master.

I Realised that I would not always need this many tiles in one large block, and that it would be better if I could snap this block up into different sections.

So I cleared out space between some of the tiles. This means that more silicone will run between these tiles, keeping them relatively separate when cast in plaster.


As you can see from the shot below this drastically increases the number of tiles I can make with each casting.

THe product I used to make the pink molds in the image above is called Pinkysil. This is a RTV silicone (room temperature vulcanising) which is easy to use because it is mixed in a 1:1 ratio. I found it great to work with when making the small mold in the image above, but when making the large mold the silicone set too quick and impeded my ability to get it finished in time. (Pinkysil starts to gel in 6 minutes or less depending on the temperature).
Next time I will use an RTV silicone with a a longer pot life, like Ultrasil.
FTR I bought the silicone and dental plaster from adelaide molding and casting supplies in Ascott Park. www.amcsupplies.com.au THey deiliver and also sell over the counter
After a day and bit of casting this is the product of my labour (and over 4kg of hydrocal).


 . I chose Ultrasil after reading reviews on several different products.


 .
.


