Post by hivemindintrainin on Jan 12, 2011 21:28:35 GMT 9.5
So during the xmas new years holidays, I became a little bored and needed something to fill the time and keep my occupied and doing something.
I have had a couple of games around at my place on my dinner table, but sadly I didn't think of gaming when I purchased it. As such its 3 1/2"x 8 1/2" too small. Only being just short of the proper 6' width didn't really matter too much, but the depth did. When reserves had to come on or just wanted to hang back that dev squad out of retaliation became annoying.

So with that I sat down and thought about what I wanted out of it.
So first thing first, the gaming table bit itself. I had to go with 3mm MDF, as that was the only size Mitre 10 down the road had that was closest to 1830x1220. I originally wanted to use 9mm, as a sturdy board to go from, but it only went to XXXXx1200. So that would have left me an inch short, and well, would have defeated the purpose altogether. So 3mm will have to do for the moment. If it doesn't cut it and flexes too much, I'll just have to buy a couple of sheets 9mm and have heaps of excess.
I have seen and heard of 2'x2' modular MDF boards used to make the gamin table out of, but they tend to have terrain pre-made on top. Meaning I'd have to create pieces that could all connect in many different permutations....of which I didn't have THAT much free time on my hands. So, I split it up into 3 sections, each 4'x2', which conveniently fits perfectly into my car boot ;D
With the table surface itself dealt with, a secure and nice looking way to put it on top of the dinner table needed to be made. A frame for it to sit in was my best idea. A frame would be built, so that the 6'x4' table would be contained within it and stop the 3 4'x2' pieces from moving around. I saw an idea somewhere on the webs, and it had the table raised above the table itself and looked like a 3" lip around it to contain the huge mountains and other terrain that got placed within. They had to assemble it with a cordless drill and took over and hour to knock together. I liked what they did, but I wanted to make a quicker and toned down version of that.
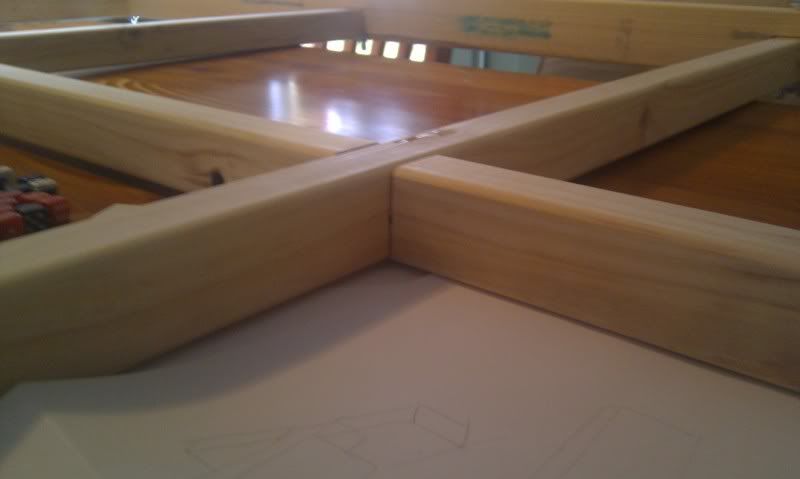
So a trip down to Mitre 10 again to find what they sold in wood sizes. I settled with 70x35 pine for the outside frame. It gave me a width that wasn't too ridiculous and enough height without reading a high chair to play in later on. Now since my access to woodworking equipment was nil and knowledge of correct or maybe more informed on wood joining techniques, I settled with what I remembered to be a half lap join. Basically instead of joining the the two pieces to butt up against each other, cut out half the width where they join, so they overlap. making a stronger and secure join.
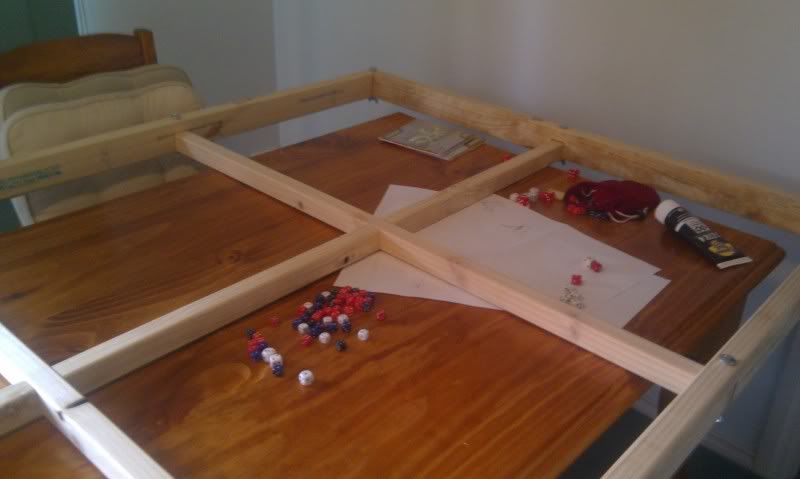
I also bought some 42x35 pine which served as cross-members for support as the MDF would sag in the middle. The idea being the the MDF would 'float' on top of the cross-member frame as for support. I sat down for a little bit first before settling on those wood sizes. Some wood was taller and some was wider. When stacking it all together, the 70mm pine with the 42mm next to it with a 3mm MDF on top gave me a 25mm lip to play on. The other configurations were a 3mm lip, which meant like the base would be level with the frame, or a huge 40mm lip, which was not needed because the frame would be sitting around 60mm above the table, plus that pine costs more. So the 25mm lip gives me room to upgrade the 3mm MDF if I need to later on, and stops those pesky dice from jumping off the damn table!
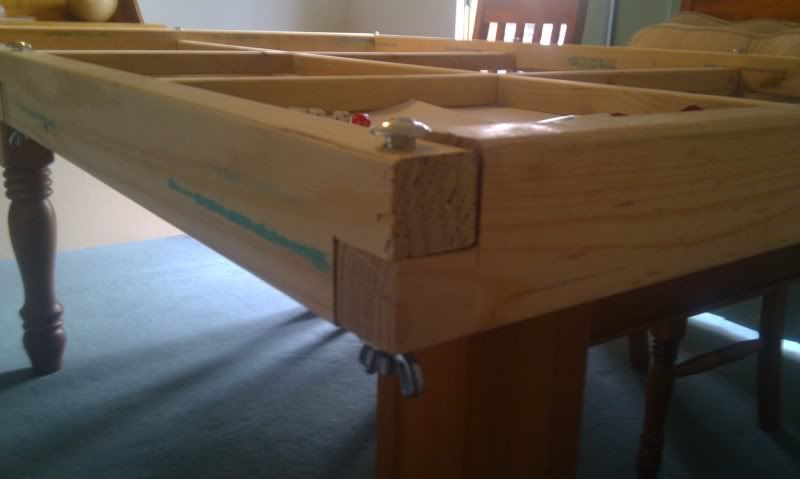
So after measuring twice and cutting once with a jigsaw I acquired ;D I just needed a way of securing the frame together and quickly. I looked into a few different ideas, and was looking a long time at a bracket of some sort on the 4 internal corners to hold them together, but attaching it and then making sure it was secure was a problem. I decided to go simple with a carriage bolt in the main joins and secured underneath with a wing-nut. A quick and simple way I think. There probably is a more effective way to do so, but it works fine.
Completed all the holes for the bolts to go through last night and well.....here are some pics of a few stages of assembly.

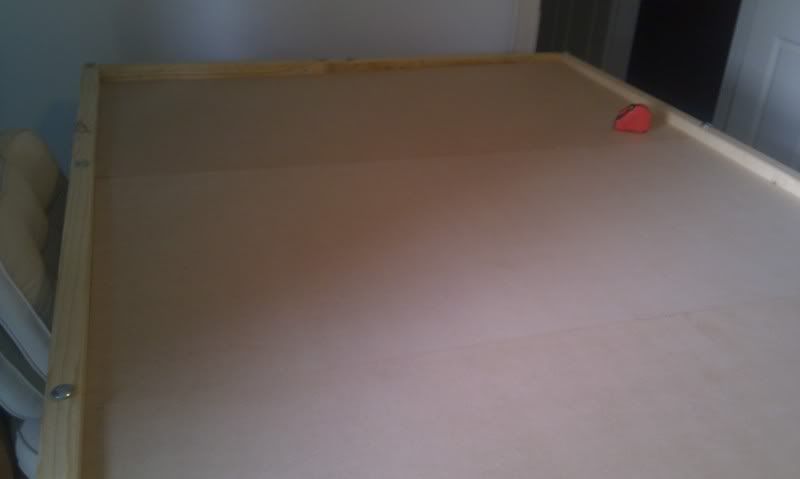
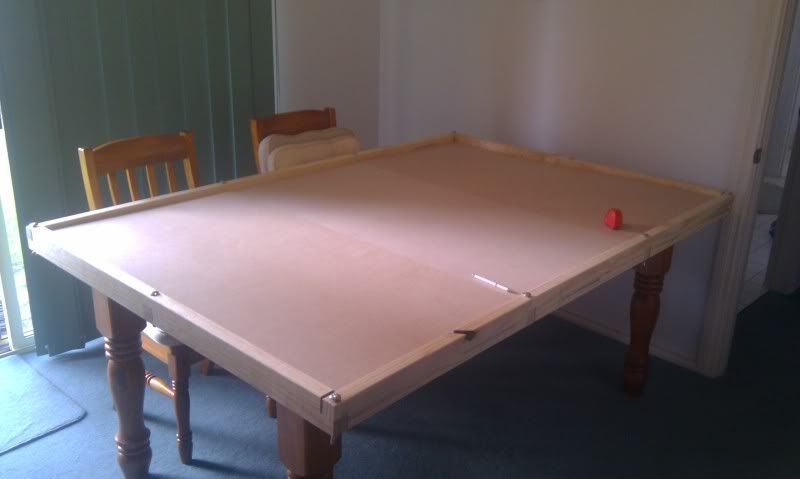
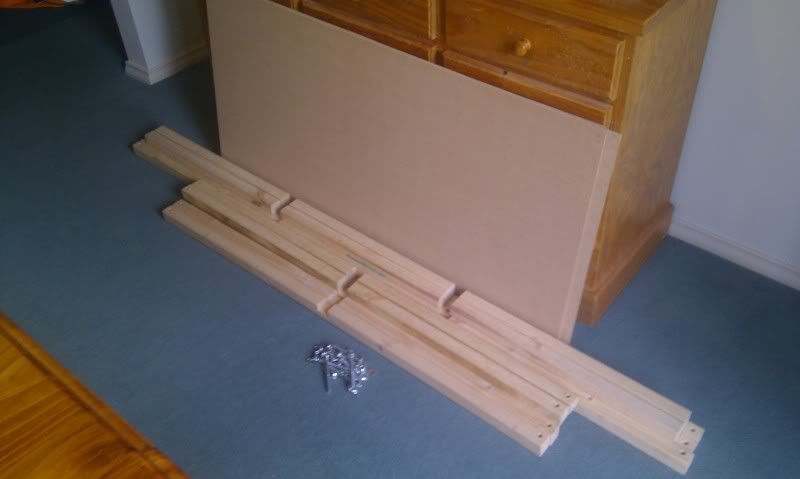
Did a quick measure up after it was all put together. Even though I measured twice, I goosed up on one piece. Sadly one of the end pieces in the middle, by 5mm. I cut 640 instead of 645. so as a result, in that corner there is a little gap in one corner. I'm not too fussed as everything is alright, and I could go buy another piece and cut it correctly if it bugs me so. So the table ended up being 4mm too deep and 3mm too wide. I'm happy with those results, better than being under. As you can see the whole thing goes to a small package and easily stored.
So there are a few things left to
So thats what I've been doing lately....
Any comments? Improvements?
I have had a couple of games around at my place on my dinner table, but sadly I didn't think of gaming when I purchased it. As such its 3 1/2"x 8 1/2" too small. Only being just short of the proper 6' width didn't really matter too much, but the depth did. When reserves had to come on or just wanted to hang back that dev squad out of retaliation became annoying.

So with that I sat down and thought about what I wanted out of it.
- a 6'x4' gaming area...duh
- to be placed on top of my existing dinner table
- to be easily assembled, so don't have to store a 6'x4' piece of MDF in my garage
- keep my options open later on if I need to adjust/add things to it.
So first thing first, the gaming table bit itself. I had to go with 3mm MDF, as that was the only size Mitre 10 down the road had that was closest to 1830x1220. I originally wanted to use 9mm, as a sturdy board to go from, but it only went to XXXXx1200. So that would have left me an inch short, and well, would have defeated the purpose altogether. So 3mm will have to do for the moment. If it doesn't cut it and flexes too much, I'll just have to buy a couple of sheets 9mm and have heaps of excess.
I have seen and heard of 2'x2' modular MDF boards used to make the gamin table out of, but they tend to have terrain pre-made on top. Meaning I'd have to create pieces that could all connect in many different permutations....of which I didn't have THAT much free time on my hands. So, I split it up into 3 sections, each 4'x2', which conveniently fits perfectly into my car boot ;D
With the table surface itself dealt with, a secure and nice looking way to put it on top of the dinner table needed to be made. A frame for it to sit in was my best idea. A frame would be built, so that the 6'x4' table would be contained within it and stop the 3 4'x2' pieces from moving around. I saw an idea somewhere on the webs, and it had the table raised above the table itself and looked like a 3" lip around it to contain the huge mountains and other terrain that got placed within. They had to assemble it with a cordless drill and took over and hour to knock together. I liked what they did, but I wanted to make a quicker and toned down version of that.
So a trip down to Mitre 10 again to find what they sold in wood sizes. I settled with 70x35 pine for the outside frame. It gave me a width that wasn't too ridiculous and enough height without reading a high chair to play in later on. Now since my access to woodworking equipment was nil and knowledge of correct or maybe more informed on wood joining techniques, I settled with what I remembered to be a half lap join. Basically instead of joining the the two pieces to butt up against each other, cut out half the width where they join, so they overlap. making a stronger and secure join.
I also bought some 42x35 pine which served as cross-members for support as the MDF would sag in the middle. The idea being the the MDF would 'float' on top of the cross-member frame as for support. I sat down for a little bit first before settling on those wood sizes. Some wood was taller and some was wider. When stacking it all together, the 70mm pine with the 42mm next to it with a 3mm MDF on top gave me a 25mm lip to play on. The other configurations were a 3mm lip, which meant like the base would be level with the frame, or a huge 40mm lip, which was not needed because the frame would be sitting around 60mm above the table, plus that pine costs more. So the 25mm lip gives me room to upgrade the 3mm MDF if I need to later on, and stops those pesky dice from jumping off the damn table!
So after measuring twice and cutting once with a jigsaw I acquired ;D I just needed a way of securing the frame together and quickly. I looked into a few different ideas, and was looking a long time at a bracket of some sort on the 4 internal corners to hold them together, but attaching it and then making sure it was secure was a problem. I decided to go simple with a carriage bolt in the main joins and secured underneath with a wing-nut. A quick and simple way I think. There probably is a more effective way to do so, but it works fine.
Completed all the holes for the bolts to go through last night and well.....here are some pics of a few stages of assembly.


Did a quick measure up after it was all put together. Even though I measured twice, I goosed up on one piece. Sadly one of the end pieces in the middle, by 5mm. I cut 640 instead of 645. so as a result, in that corner there is a little gap in one corner. I'm not too fussed as everything is alright, and I could go buy another piece and cut it correctly if it bugs me so. So the table ended up being 4mm too deep and 3mm too wide. I'm happy with those results, better than being under. As you can see the whole thing goes to a small package and easily stored.
So there are a few things left to
- Countersink the carriage bolts so they are flush with the frame.
- give all the frame another sand
- reckon I'm going to stain the table too. Make it look 'special'
- also thinking of getting a little gold plaque attached and engraved with something memorable on it for a little laugh.
- the 6' pieces are too long for the boot at the moment, so the idea is to saw them in half and then attach a hinge on them so they fold up for better storage.
- attach along the inside of the frame cabinet holders so that the MDF is supported not only in the middle but all around the edge. As it is only supported on the cross-members, so sags at edges.
So thats what I've been doing lately....
Any comments? Improvements?


 )
)
